

Guide To CNC Chuck Jaws: Soft Jaws vs. Hard Jaws
soft jaws are more adaptable but wear out faster, while hard jaws are more durable but less flexible for customizing the fit of the workpiece. ...
Read More
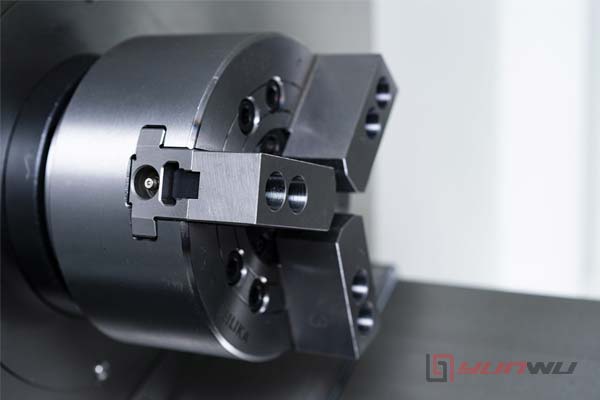
A 3 jaw chuck is a commonly used clamping device mounted on machines like lathes and milling machines to hold and position workpieces securely during machining operations. It consists of three movable jaws evenly spaced around the chuck body that simultaneously move when adjusted, allowing the chuck to automatically center and grip round or hexagonal workpieces quickly and with reasonable precision. This self-centering feature makes a 3 jaw chuck ideal for fast-paced machining tasks such as turning, drilling, milling, and grinding, where quick setup and moderate accuracy are important.
The three jaws move in unison, controlled by a scroll mechanism inside the chuck, which allows consistent and symmetric gripping force around the workpiece. Typically, a 3 jaw chuck can reliably center workpieces to within a few thousandths of an inch, suitable for most general applications but less precise than a 4 jaw chuck, which allows independent jaw adjustment for higher accuracy.
3 jaw chucks are widely used because they balance speed and ease of use with sufficient holding power in light-to-moderate machining tasks involving cylindrical or hexagonal parts. They may have soft or hard jaw options depending on the material being held and are usually made of durable materials like cast iron or forged steel to withstand the rigors of machining.
In summary, a 3 jaw chuck is a self-centering device with three jaws that grip round or hexagonal workpieces simultaneously, facilitating quick and reasonably accurate machining setups on lathes and similar tools.

soft jaws are more adaptable but wear out faster, while hard jaws are more durable but less flexible for customizing the fit of the workpiece. ...
Read More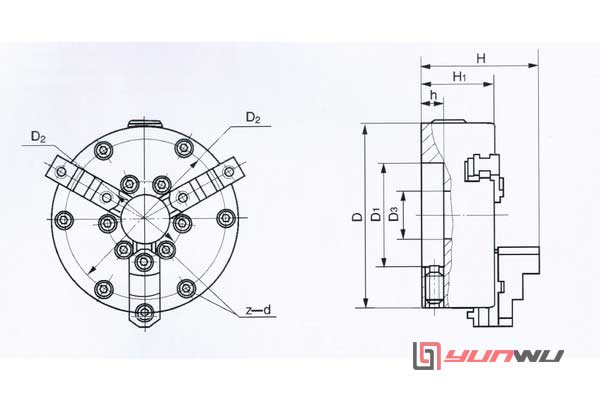
A 3-jaw lathe chuck comes in various sizes to suit different machines, typically ranging from 80 mm (3 inch) to 315 mm (12.4 inch) in diameter....
Read More2-jaw chuck is a specialized type of chuck designed for holding and securing irregularly shaped or asymmetrical workpieces during machining processes. ...
Read More4-Jaw Chuck is a type of chuck, which is a clamping device used to secure a workpiece on a lathe or other machining equipment. ...
Read MoreA hydraulic chuck is a precision tool holder widely used in machining operations for its high accuracy, excellent grip force, and vibration damping capabilities. It operates using hydraulic pressure to clamp the cutting tool securely. This article will explain the working principle, advantages, and applications of hydraulic chucks....
Read MoreThe CNC lathe power chucks main types include pneumatic chucks, which use compressed air for quick and efficient operation, and hydraulic chucks, known for their high clamping force and precision....
Read More
3 jaw chuck is a self-centering device with three jaws that grip round or hexagonal workpieces simultaneously, facilitating quick and reasonably accurate machining setups on lathes and similar tools....
Read MoreRotary cylinders are actuators that convert pneumatic or hydraulic energy into rotational motion. They are crucial in industries where rotary motion is needed but linear actuators would be inefficient....
Read MoreThis guide provides a more in-depth look into rotary cylinder actuators, offering technical insights into their types, applications, design components, operating principles, and maintenance practices. ...
Read More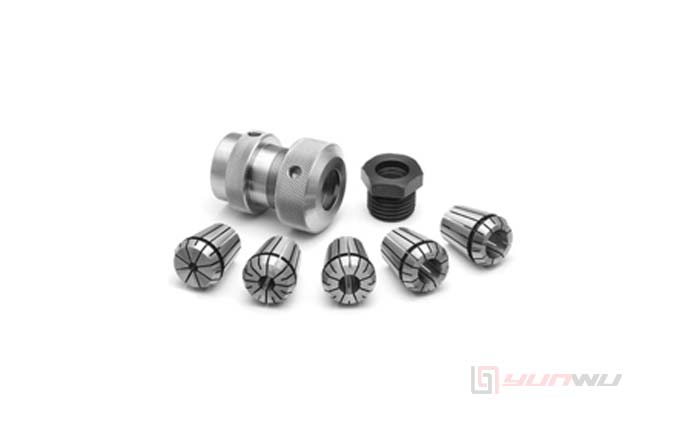
A collet chuck is a specialized clamping device used in machining and other applications to hold workpieces or cutting tools securely. ...
Read MoreCommon types include pneumatic rotary actuators, which use compressed air; hydraulic rotary actuators, powered by fluid pressure; electric rotary actuators, which use electrical energy; Each type offers specific advantages based on force, speed, and control precision....
Read MoreRotary index table, also known as a indexing table, is a precision mechanical device that facilitates the rotational positioning of workpieces in machine tools and automated systems....
Read More
Get A Quote
Get A Free Consultation
Please feel free to get in touch using the form below.We shall reply within the following 24hrs.