

Guide To CNC Chuck Jaws: Soft Jaws vs. Hard Jaws
soft jaws are more adaptable but wear out faster, while hard jaws are more durable but less flexible for customizing the fit of the workpiece. ...
Read More
A typical 4-Jaw Chuck consists of the following main components:
Body: The chuck body is the main part that houses the jaws, and it is usually made of hardened steel or cast iron. The chuck body is mounted onto the spindle of the lathe or machine.
Jaws: The four jaws are the primary components that grip the workpiece. Each jaw can be adjusted individually to accommodate the shape, size, and position of the workpiece. The jaws are typically equipped with serrated or smooth surfaces to ensure a secure grip.
Jaw Adjusting Mechanism: The independent adjustment of the jaws is made possible by a threaded mechanism. This mechanism allows the user to move each jaw in or out, depending on the requirements of the workpiece.
Backing Plate: The backing plate is attached to the chuck body and serves as a platform for mounting the chuck onto the lathe’s spindle. It provides the necessary support to the entire chuck assembly.
Clamping Mechanism: The clamping mechanism typically includes screws, bolts, or other fasteners that help secure the workpiece once the jaws are positioned correctly.
There are several different types of 4-Jaw Chucks available in the market, each designed for specific purposes:
Independent 4-Jaw Chuck: In an independent 4-Jaw Chuck, each jaw can be adjusted independently, allowing for the most precise positioning of the workpiece. This type of chuck is ideal for irregularly shaped workpieces or those that need to be centered manually. It is commonly used in applications where high precision is required.
Self-Centering 4-Jaw Chuck: A self-centering 4-Jaw Chuck features a mechanism that allows all four jaws to move simultaneously to clamp the workpiece. This design combines the benefits of a 3-Jaw Chuck and a 4-Jaw Chuck, providing both ease of use and the ability to handle irregularly shaped parts.
Combination 4-Jaw Chuck: The combination 4-Jaw Chuck combines the features of both independent and self-centering chucks. It provides flexibility by allowing the user to switch between self-centering and independent jaw movement, depending on the requirements of the task.
Precision and Accuracy: One of the main advantages of a 4-Jaw Chuck is its precision. The ability to independently adjust each jaw allows for the precise centering and alignment of the workpiece, even if it is irregularly shaped or off-center.
Versatility: 4-Jaw Chucks are highly versatile tools. They are capable of gripping both round and irregularly shaped workpieces. Whether a workpiece is square, hexagonal, or has an odd shape, the independent adjustability of the jaws allows the user to position the workpiece with accuracy.
Higher Clamping Force: A 4-Jaw Chuck can generate a higher clamping force compared to a 3-Jaw Chuck, which makes it more effective when working with hard or tough materials.
Versatile Applications: The 4-Jaw Chuck can be used for a wide range of applications, including turning, milling, grinding, and drilling.
Better Workpiece Stability: With four points of contact, a 4-Jaw Chuck provides better stability compared to 3-jaw chucks.
Customization: The ability to adjust each jaw independently allows for customization in the way the chuck grips the workpiece.
Proper maintenance is crucial to ensure the longevity and effectiveness of a 4-Jaw Chuck. Some key maintenance practices include:
Regular Cleaning: Dirt, oil, and debris can accumulate in the chuck over time, affecting its performance.
Checking Jaw Alignment: Over time, the jaws can become misaligned, which may affect the precision of the chuck.
Jaw Inspection: The jaws should be regularly inspected for wear, cracks, or other signs of damage.
Lubrication: The chuck’s moving parts should be lubricated periodically to prevent rust and reduce friction.
To install a 4-jaw chuck, follow these steps:
Clean the Mounting Surface: Ensure the spindle nose and chuck backplate are clean and free of debris.
Align the Chuck: Position the 4-jaw chuck onto the spindle, aligning the mounting holes on the chuck with those on the spindle.
Secure the Chuck: Insert and tighten the mounting bolts evenly, using a wrench. Tighten in a criss-cross pattern to ensure even pressure.
Check the Tightness: Ensure the chuck is securely mounted to avoid any movement during operation.
Test for Accuracy: After installation, check the chuck’s alignment with a dial indicator and adjust as needed.
Here's a simplified guide on how to use it:
Install the Chuck: Mount the 4-jaw chuck on the lathe spindle and secure it tightly.
Adjust the Jaws: Loosen the four jaws. You can adjust them individually by rotating the chuck’s central screws.
Place the Workpiece: Position the workpiece in the chuck, ensuring it's roughly centered.
Center the Workpiece:
Secure the Workpiece: Tighten the jaws evenly to hold the workpiece firmly.
Start Machining: Once the workpiece is secure and centered, you can begin machining.
To center a 4-jaw lathe chuck:
4-jaw chuck is versatile and can hold a variety of shapes, including:
The concentric rings on the face of a four-jaw chuck are primarily for precision alignment and to aid in centering workpieces. They help provide a visual reference for proper positioning, ensuring the workpiece is evenly clamped and reducing the risk of eccentricity or runout. These rings improve the overall accuracy of machining operations.
To center round stock in a 4-jaw chuck and measure spindle runout accurately, follow these steps:
Centering the Round Stock:
Measuring Spindle Runout:

soft jaws are more adaptable but wear out faster, while hard jaws are more durable but less flexible for customizing the fit of the workpiece. ...
Read More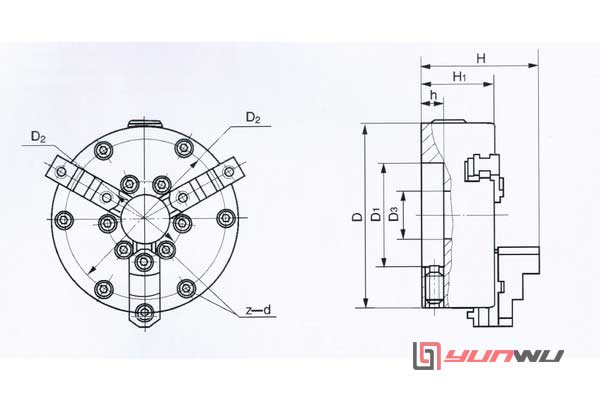
A 3-jaw lathe chuck comes in various sizes to suit different machines, typically ranging from 80 mm (3 inch) to 315 mm (12.4 inch) in diameter....
Read More2-jaw chuck is a specialized type of chuck designed for holding and securing irregularly shaped or asymmetrical workpieces during machining processes. ...
Read More4-Jaw Chuck is a type of chuck, which is a clamping device used to secure a workpiece on a lathe or other machining equipment. ...
Read MoreA hydraulic chuck is a precision tool holder widely used in machining operations for its high accuracy, excellent grip force, and vibration damping capabilities. It operates using hydraulic pressure to clamp the cutting tool securely. This article will explain the working principle, advantages, and applications of hydraulic chucks....
Read MoreThe CNC lathe power chucks main types include pneumatic chucks, which use compressed air for quick and efficient operation, and hydraulic chucks, known for their high clamping force and precision....
Read More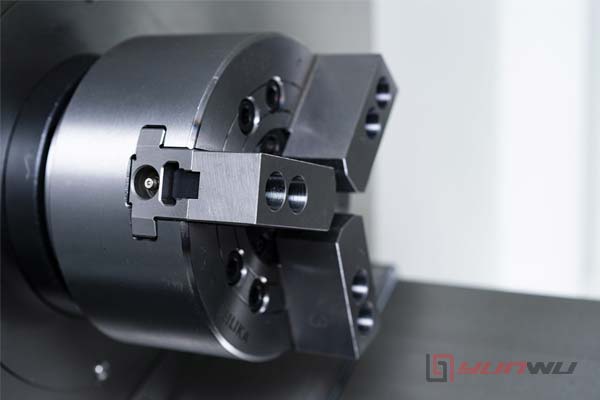
3 jaw chuck is a self-centering device with three jaws that grip round or hexagonal workpieces simultaneously, facilitating quick and reasonably accurate machining setups on lathes and similar tools....
Read MoreRotary cylinders are actuators that convert pneumatic or hydraulic energy into rotational motion. They are crucial in industries where rotary motion is needed but linear actuators would be inefficient....
Read MoreThis guide provides a more in-depth look into rotary cylinder actuators, offering technical insights into their types, applications, design components, operating principles, and maintenance practices. ...
Read More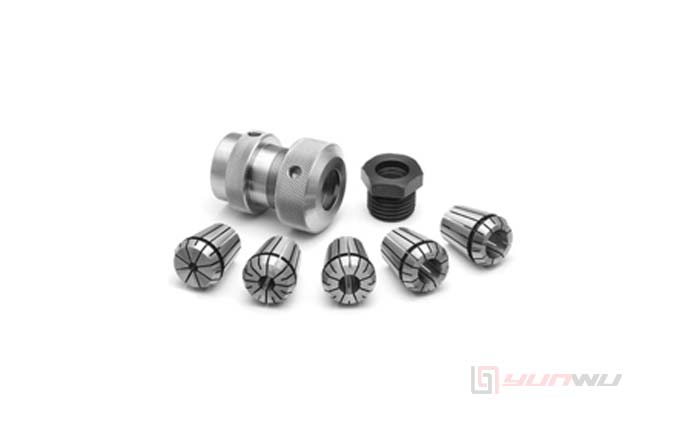
A collet chuck is a specialized clamping device used in machining and other applications to hold workpieces or cutting tools securely. ...
Read MoreCommon types include pneumatic rotary actuators, which use compressed air; hydraulic rotary actuators, powered by fluid pressure; electric rotary actuators, which use electrical energy; Each type offers specific advantages based on force, speed, and control precision....
Read MoreRotary index table, also known as a indexing table, is a precision mechanical device that facilitates the rotational positioning of workpieces in machine tools and automated systems....
Read More
Get A Quote
Get A Free Consultation
Please feel free to get in touch using the form below.We shall reply within the following 24hrs.